Final Project’s Prototype


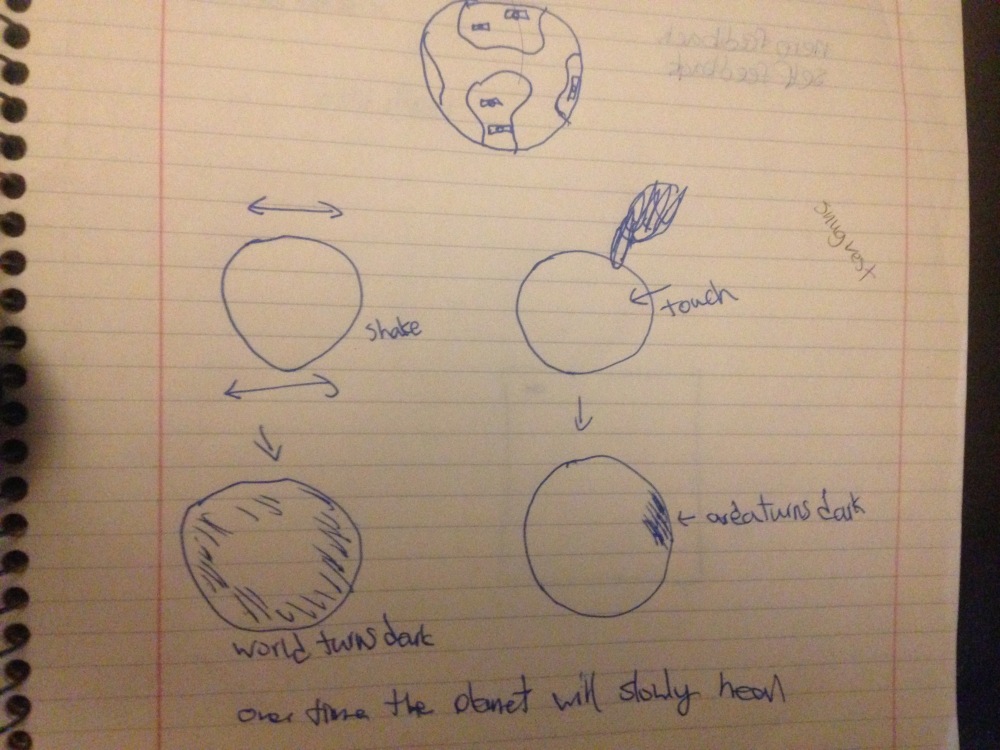
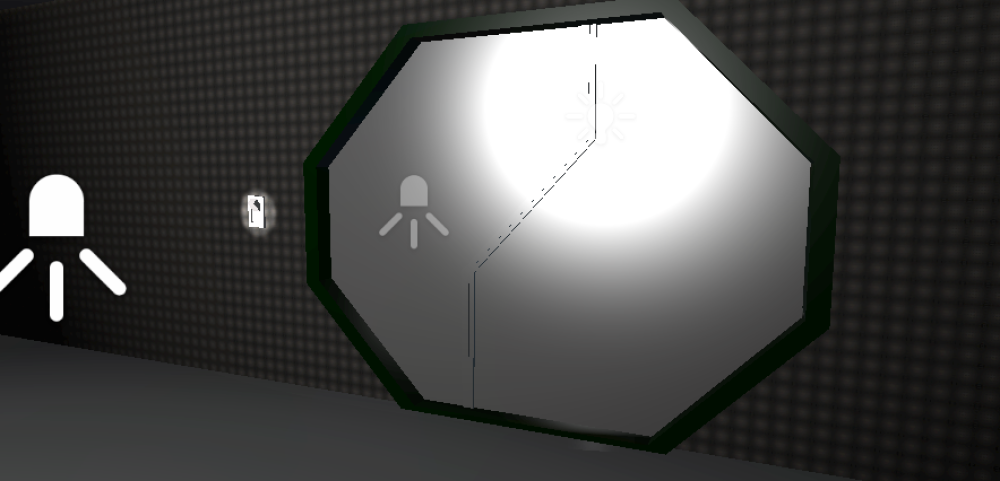
The construction of the Earth

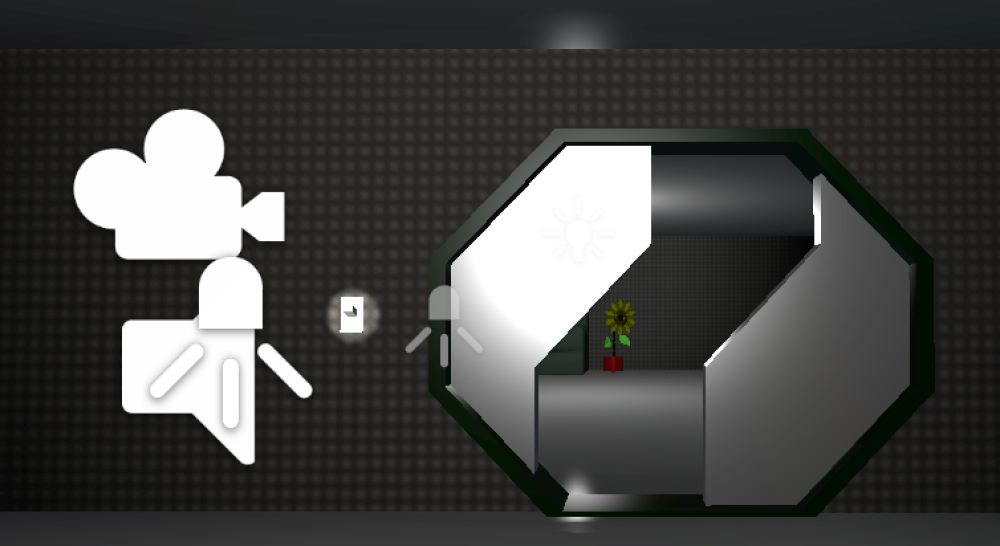
I was able to create a frame Using Craft wires by bending them into pentagons and with a total of 12 sides. The pentagons are taped and divided into the upper and lower half. I wanted to portrait the earth as a fragile ecosystem so I used limited wires for the frame and to fill the pentagons, I used paper from the first project as a symbol of recycling. The earth is made up of 12 pentagons and 6 are blue tissue paper, 2 for the north and south poles and the remainder are for the land. The earth is made by 70% water therefore the most of the area are blue.


For the inside I used another wire frame to support the Arduino and its connections so that it wouldn’t crush the other frame.

Testing

For the final project’s prototype I kept the core idea but had to change several components for the original idea. In my original Idea I planned to used several of soft circuits but I had done some research and using capacitive sensor, because I am able to create a better effect and it is also easier to make with pre existing components. During the testing phase, I initially planned for at least 5 capacitive sensors using the available resistors but after further testing, I realized that only 2 of my 5 resistor worked with it and used the rest for the LEDs. I later found that using a external battery would not supply sufficient power to the capacitive sensors therefore it must be plugged in to the computer

IMG_2224.jpg

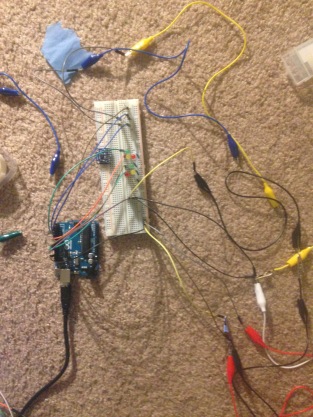
The circuit consists of 2 capacitive sensors, 1 accelerometer 6 coloured LEDs and 3 white Adafruit LEDs. Each capacitive sensor controlled 3 coloured LEDs and the accelerometer controls all the LEDs.
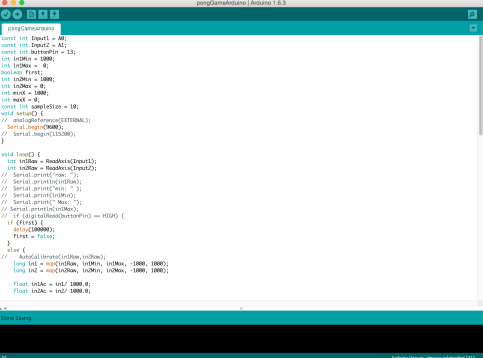
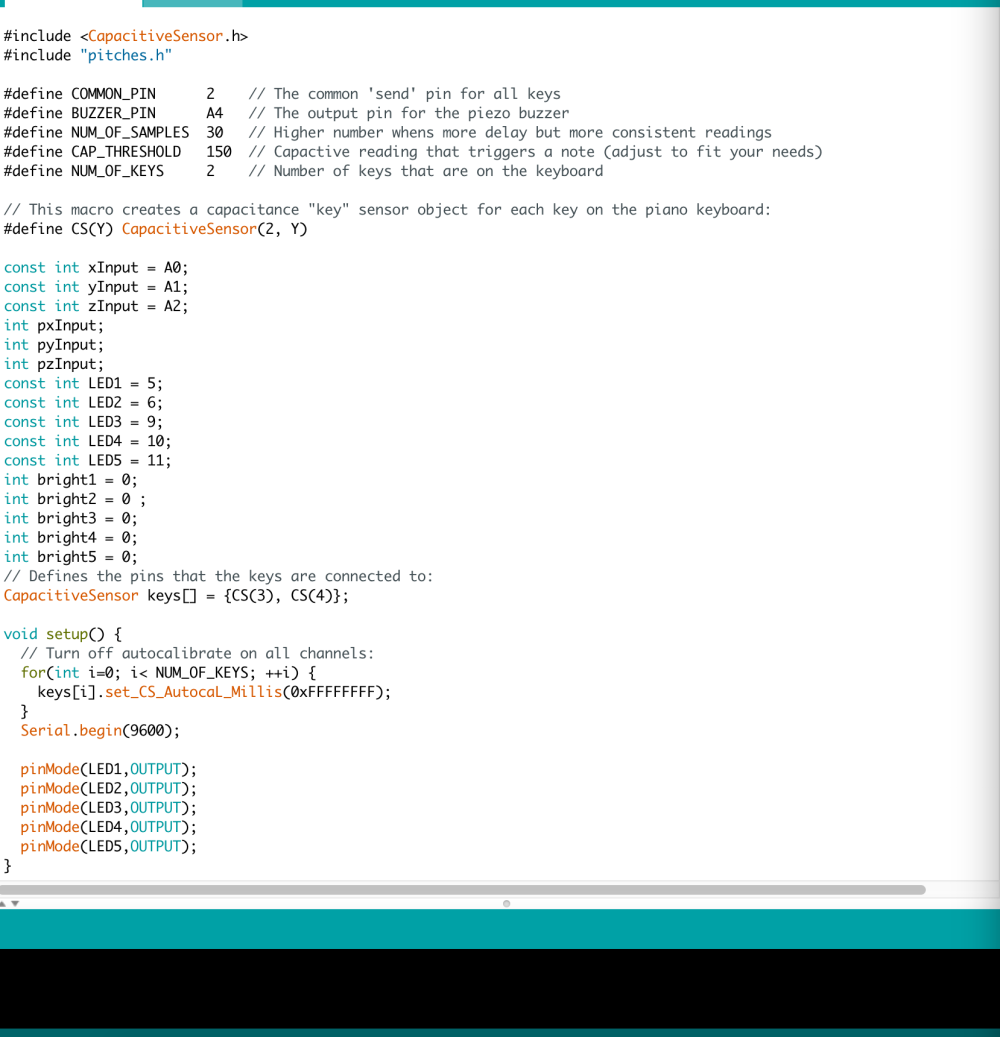
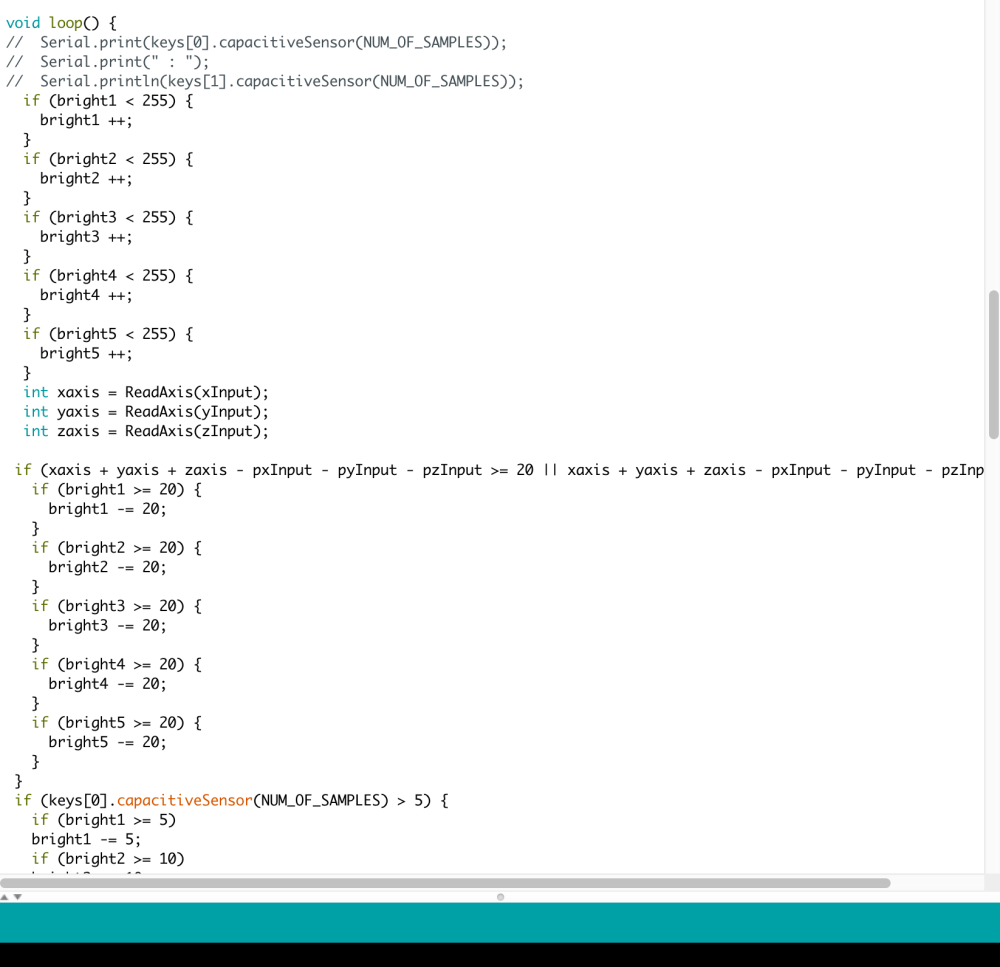
CODE

Screen Shot 2016-03-22 at 8.54.53 PMScreen Shot 2016-03-22 at 8.55.06 PMScreen Shot 2016-03-22 at 8.55.39 PM

Video

Final Project Design

The idea is how humans impacted the globe and how we should preserve wild life.

A User would interact with a ball, and depending on how they interact with it, the ball would react differently.

The ball inputs would be using an accelerometer and a soft circuit matrix, the output would consist of a LED matrix and a vibration motor.

when the user shake the ball, the accelerometer would trigger and the ball would slowly dim and darken, when the user presses on a point on the ball, the surrounding LEDs would dim. As the ball lights dim, the ball would start vibrating violently and the only way the the ball the light up again is time and for the user not to interact with the ball.

IMG_2154.JPG

IAT 320 Iteration and Design

I wanted to create a project that promotes movement so I designed a piece that utilize an accelerometer and Arduino communication with Processing. The initial idea is to use the library’s Arduino Bluetooth so that everything could be done wirelessly. The first thing i worked on was the code for Processing, as I had previous experience with Processing to Arduino communication from 267, it shouldn’t be to hard.

The Design was to have an air hockey table made via Processing and have the player move around that which in turn move the blue paddle.

Processing

My first initial coding, the output looks like this:

Screen Shot 2016-03-01 at 9.30.14 PM.png

https://drive.google.com/file/d/0B3Cb3gk5EtyVcnB6UWtkUWJRN1E/view?usp=sharing 

This version had all the basic features, the collision detection between the paddle and puck was definitely the hardest part and the version has its movement done with arrow keys instead of using the Arduino. In the second version I included the Arduino Communication so that the movement was done via Arduino.

https://drive.google.com/file/d/0B3Cb3gk5EtyVZUtxM01TdHpfUVE/view?usp=sharing

Arduino


the initial intent was to mount an accelerometer onto an Arduino BT(Bluetooth) from the library but unfortunately after sewing it on the connection between my computer and the Arduino did not work, it would try to connect but fail despite looking up several tutorials. The next design was to have a regular Arduino UNO with a long wire connected to computer to send the accelerometer data.

The coding for the Arduino was tough as I couldn’t find the correct way for detecting the exact data that i wanted and as a result, the data received seemed inconsistent.

https://drive.google.com/file/d/0B3Cb3gk5EtyVak1aTHJFSVN3eU0/view?usp=sharing

The Circuit is sewed onto the sweater from Assignment 2 and has a basic setup:

Screen Shot 2016-03-01 at 11.20.48 PM.png

Untitled-2.png


Weekly Assessment

This week I worked on modelling a few items and as well worked on matches. I worked on the matches mainly the script on when they should appear and the particle effect of the fire. Using the standard asset for the fire as its the best and easiest at the moment.

Weekly Assessment

This week I focus mainly on asset making and scripting. The basic structure of the game is made i.e. interaction with objects such as key and door. I’ve also in the process of making assets like telephone and more varieties of doors. The lighting source is yet to be done but i think i know how to proceed.

IAT 320 Assignment 2 – Final

PROCESS

For the final version of the hoodie I began the testing if the all the circuit make sense and would work before sewing so that I won’t come some problems later on.

The sewing began, once the LED circuit was complete I tested it out and came to a halt, unfortunately, during my circuit testing phase i only tested 2 of the 3 multi color LEDs and found that the third one was not actually working after I sew it on. so lots of removing and resewing was done to replace the faulty LED.

Once the problem was rectified I did the light sensor in the back and got a chance to test them both out to see if they work together. The second major problem i encountered was that I sew the wires a bit tight and the sweater was a tight fit, so when i put the sweater on, wires connected to the LEDs would snap and I had to do repairs at least 4 times before they were stable and not break when I put it on, at this point I knew I would not have time to do a soft switch but if I had more time, I would do that next. The lights now change depending on how much light is being received by the light sensor on the back.

Design

the design for the circuit is quite clean, on the inside the circuit is clearly visible and easy to follow through to see where each wire goes. for the outside and back, wires are hidden and only the light sensor in the back of that hood can be seen.

Concept

The mood of the person is shown represented by the lights, green light is shown at a low lighting representing the comfort and relaxed. When the lighting starts getting brighter, it will turn red as it intensifies and finally Yellow representing warm and cheerful.

The LED lights also can be used as a flashlight, reading at a low lighting can also be achieved as I understand red light does not ruin night vision and the lights can be used as a hazard light when crossing street at night for cars.

Video

https://drive.google.com/file/d/0B3Cb3gk5EtyVMndXS0dudTdyYVk/view?usp=sharing

a short video demonstrating how the sweater works.

IAT 320 Assignment v2.0

for my second version of assignment 2, I decided i wanted to do a hoodie that lights up differently depending on the soft switch on the pocket. I wanted the hoodie to light up as soon as you put in on and the trigger of it is a light sensor at the back. The soft switch would allow the colors to change.


The Concept is that when someone put on the hoodie, it will light up with red, yellow and green. Each color represent a different emotion red for passion yellow for warmth and green for comfort. For the final version for assignment 2 some changes were made due to time constraint.

Assignment 2 Original Prototype

In the original design, I intended to use a shoulder bag, when the bag is put on, if the soft circuit isn’t complete the LED and vibration motor will go off, once the circuit is complete, the lights and vibration stops. the buckle is used as a soft circuit.

The concept for this ideation is that as a person who loses things all the time, one of the key reason is that i leave my bag open and sometimes things fall out when it flips. so when the bag is not properly buckled, the user is notified via vibration and also lets others around know that there is something wrong. the LED was going light up as red for anger emotional response as it frustrates me when ever I lose things. Due to constraints and limited emotional response, I’ve changed the concept drastically.

Weekly Assessment

This week I started working on some assets and programming the interaction, I understand that the game will heavily rely on strong effects and I started trying different stuff like lighting triggered by proximity, highlighting intractable objects.

Screen Shot 2016-02-03 at 9.45.27 PM.pngScreen Shot 2016-02-03 at 5.02.19 PM.pngScreen Shot 2016-02-03 at 9.45.59 PM.pngScreen Shot 2016-02-03 at 9.46.11 PM.png